Page 1 of 6
Make Stuff Log
Posted: Sun Feb 20, 2022 3:27 pm
by AxelHeyst
Like the Fixit Log, but for stuff you make from 'scratch'. Inclusive of clothing, gear, shelter, computers (any pelican case computers?), furniture, clocks...
The idea isn't to make a new post for every single step, I'm thinking more like an intro post, milestone/sticking point posts, and completion posts at max. Journal style build entries can go in your journal if you like.
Re: Make Stuff Log
Posted: Sun Feb 20, 2022 3:31 pm
by AxelHeyst
Re: Make Stuff Log
Posted: Sun Feb 20, 2022 11:26 pm
by AxelHeyst
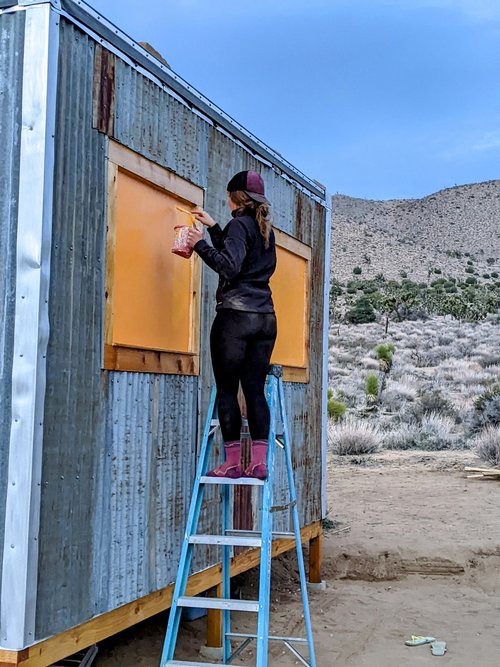
Tiny Studio Build
It's not complete, but I'm done with it for now until I come back to it in... 2023? It's a little nerve wracking buttoning up a new build in February and knowing it's going to have to sit through a Mojave August before I'll get to it again.
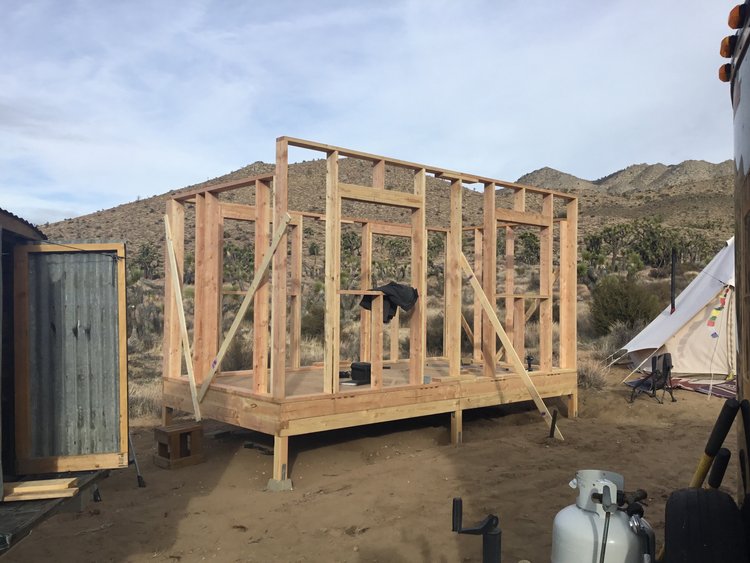
The bones.
Fort Dirtbag
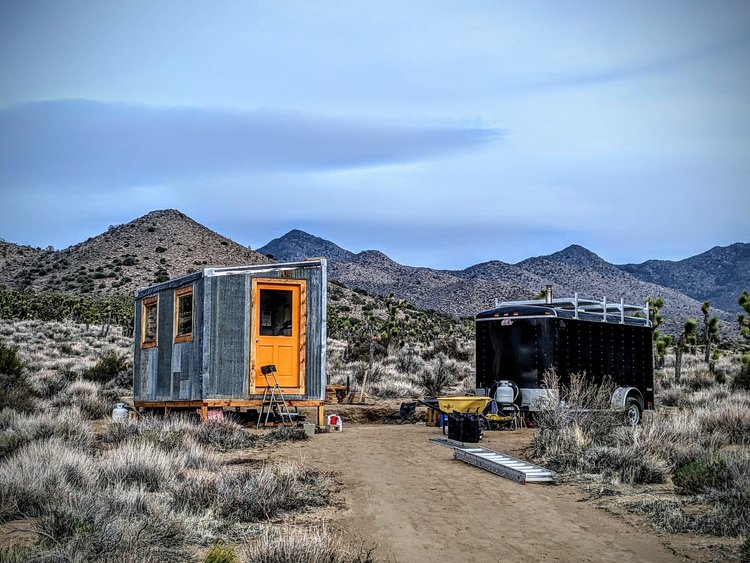
The siding is rough cut cedar fencing that I planed and dado'd a shiplap in. The stuff was super wet but seems to be doing fine.
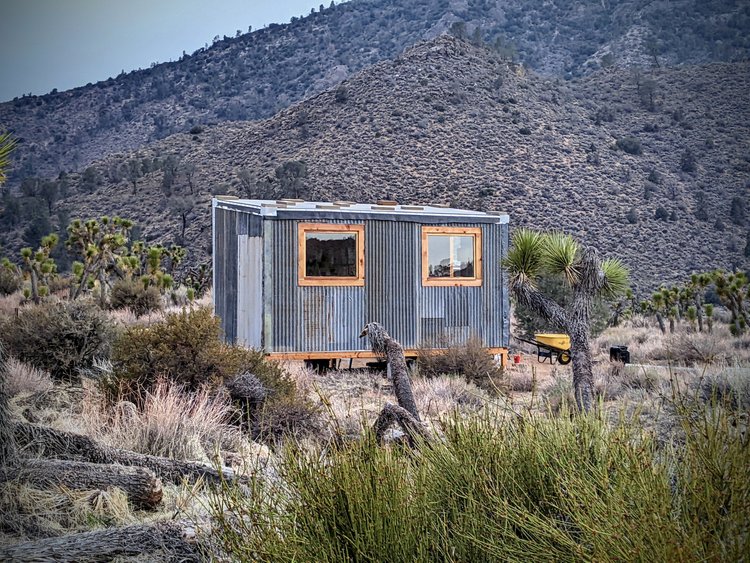
Siding is salvaged from a neighbor. Roof is one piece of EPDM rubber - future plan is to cover it with a few inches of scoria rock.
I built the windows around dual glazing units ordered to custom size. The south windows are boarded up at the moment - I'm thinking of doing a bottle wall or something like that.
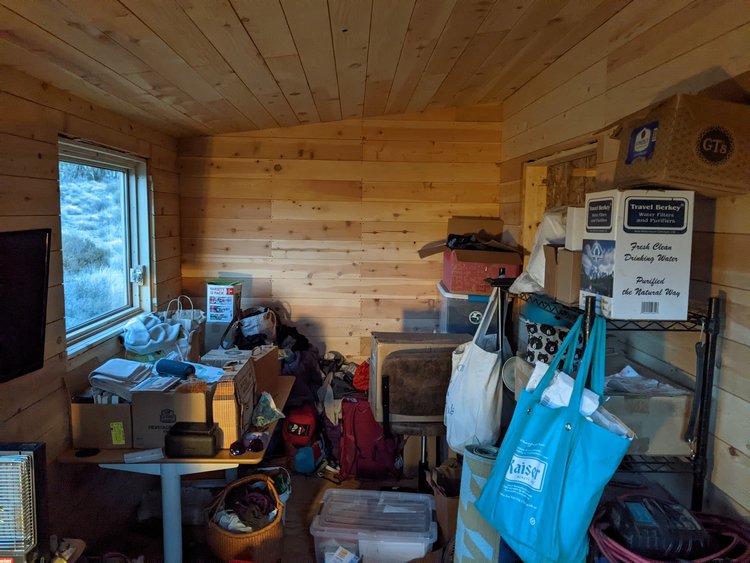
I started work around Dec 1, and worked pretty continuously up until now. Future projects on it include a southern shade structure, horizontal field geoexchange with thermal energy storage tank supplying DIY radiant panels, diy solar thermal panels, front porch, the scoria roof, interior trim, built in shelving, maybe an ERV, maybe earth tubes, east wall sun shade...
Electric is supplied from Serenity, which has an overabundance of power. At the moment heat is a little propane catalytic heater, but once I build the solar thermal the build will be combustion free. I heat my coffee water with a 300w immersion heater.
Total cost to build just over $5k. I'm committed to cracking the nut of extreme low cost methods for whatever I build next. The key there will be having no time pressure so I can ascend the S curve without rush.
Re: Make Stuff Log
Posted: Fri Mar 04, 2022 12:47 pm
by Sclass
@Axel hey nice cabin. Good idea for a log. I was waiting for something good to post up and I just completed this today. I think you'll like it.

On the fixit log I tried fixing this old cordless vac with some new Li Ion cells. I bought cheap cells and they were really weak. They'd overheat and lose power in thirty seconds of cleaning. I tried all kinds of stuff like overriding the temperature sensor in the battery pack so I could get just a bit more run time but they just got hot and lost their ability to make power. So I figured I needed to get new batteries. But it turns out good batteries - the kind used in cordless vacs and cordless tools are really expensive in small quantities. Like $5 each for Samsung, LG or BYD 18650s.
I started thinking the cheapest way to do this is buy a good battery pack for a drill and then tear it apart. I'd try to take advantage of their scale of purchasing so I could get four cells for less than 4x$5 = $20. But then I realized I had a bunch of these batteries already for my Milwaukee M18 impact drivers. No need to cut one apart. Just fit one to the vac like a Milwaukee tool and take advantage of my collection of batteries that barely get used. I started seeing the advantage of the interchangeable batteries. It is just wasteful to have a bunch of things with built in batteries just sitting there most of the time. What you want is a big shelf of tools and just a few batteries that you swap between tools since the batteries are so expensive.

I have batteries. A fast charger (far superior to the little charger on the vac that takes five hours to charge). So all I needed was a way to adapt the battery to the vac.
Thanks to Thingiverse, somebody has already designed one. I found this under M18 battery pack. I had to design a little mushroom shaped adapter. Since everything is in 3d cad it is a snap to fit all the parts together virtually and drill virtual holes for all the screws to fasten the mess together. Then I printed all the parts for roughly $3 in PLA filament.
Toadstool base. My own creation.
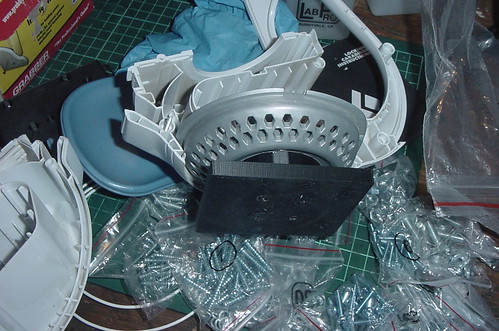
The electrical battery adapter clip from Thingiverse. It uses crimp on electrical terminals I had lying around. I had some old wire lying around too. Drywall screws I had lying around. Gorilla glue to make it strong.

Assembled.

Rip out the old batteries and hack my wiring into the vac.

Quick test to see if everything works. I don't have a voltage monitor in here so I will have to be careful about how far I discharge. I mean I will have to use the LED power gauge on the battery to make sure I don't over discharge the battery. It won't have a shutdown when the battery runs low.

Back together.
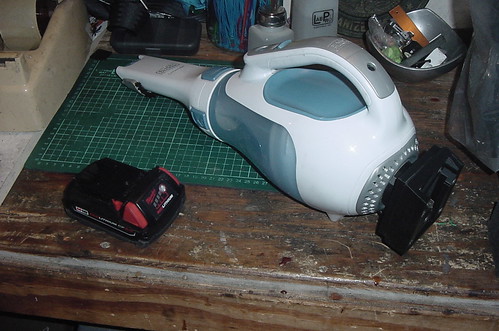

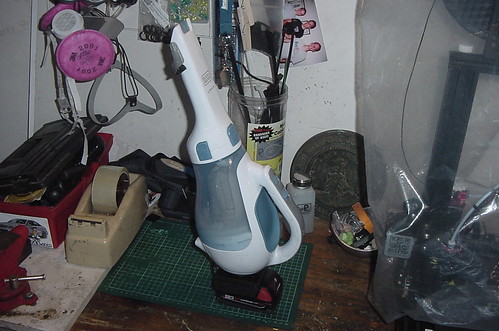
Not bad. A little off balance since there is no battery pack inside and it has the big boat anchor hanging off the back. But it works. Wow this vac howls! It is way more powerful than my other unit. And it recharges in twenty minutes. Sadly Black And Decker makes two versions of this Li Ion vac. One has four cells and one has three. This is the three cell and it is anemic compared to my four cell. But now with the M18 pack it roars.
Here it is. Stands up well. Looks nice.
Re: Make Stuff Log
Posted: Fri Mar 04, 2022 3:12 pm
by AxelHeyst
Heh, that is way cool. Nice!!
Re: Make Stuff Log
Posted: Tue May 10, 2022 11:35 pm
by Sclass
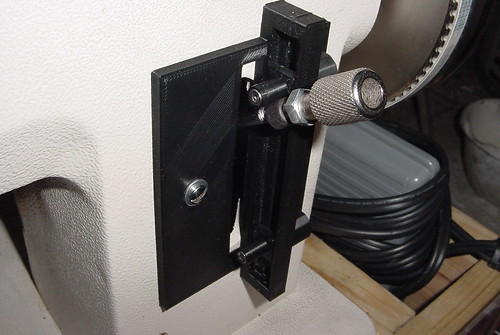
Hey I made something. I actually copied this, but we don't have a knock off log so I'll put it in the make stuff log. I always wanted this stitch length lever stop guide for my industrial sewing machine. It's made by Sailrite and it costs $50.

This is what it looks like. The black plate has two adjustable pins on it to control the limits of the stitch length lever. So when you reverse and go forward again, you can always come back to your same forward and reverse stitch length. This is important if you want consistency in the stitch length. Without this feature it is really hard to do car interiors with stitching that looks identical.

My industrial machine is a cheap copy of the Sailrite but it can take this part. I've always wanted one but the price was just to high to justify it. This is what my machine used to look like. You forward and reverse the machine by pulling the lever up or down and if you don't return the lever to exactly the same place you'll get a more or less dense stitch. It was a pain. A lot of people have sharpie marks all over their machine to serve as a guide to where to reset the lever. What you need is a stop lever to hold your forward stitch length and reverse stitch length. That's what the $50 black plate does.

So here is my solution. I took a look at this photo and I realized I could just design my own and print it on my 3D printer. Took a few measurements of my machine with a caliper. Sat down at Tinkercad and drew this up in an hour. Three different parts. The plate and the locking pins and the thumb screws. Easy.
It cost me $0.75 of filament. I love how Cura actually tells you how much filament you are using and how much it costs t the penny. There are two M3x20mm screws and two M3 nuts in the thumbscrews. Also pennies.


Looks great! Works great!

Re: Make Stuff Log
Posted: Thu May 19, 2022 7:37 pm
by Ego
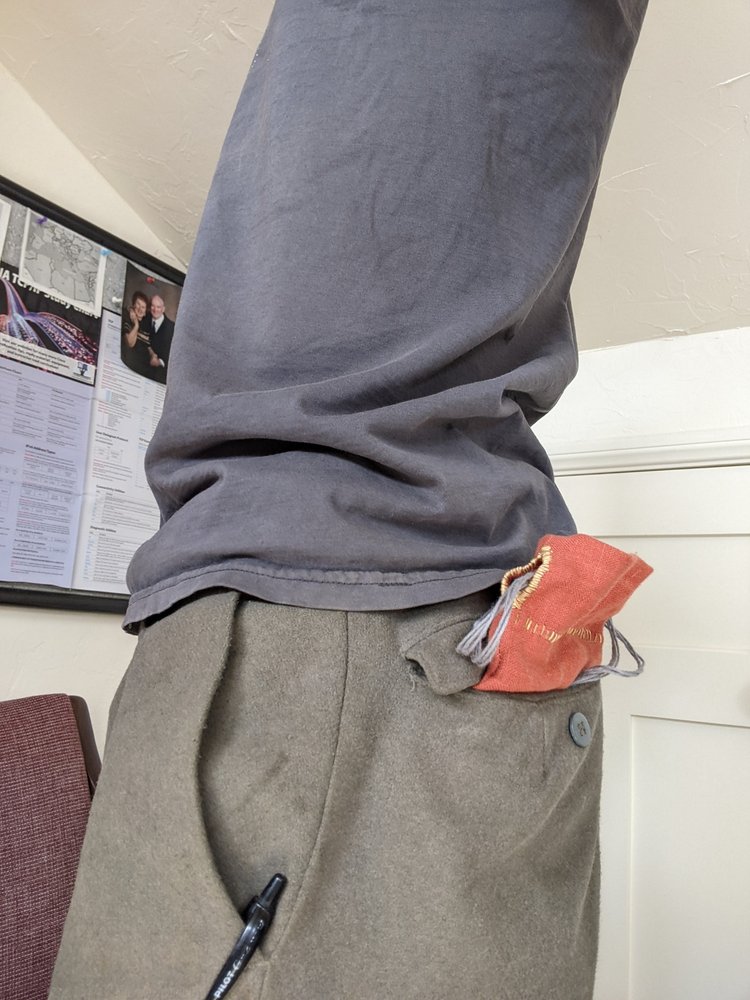
I wanted a sheath for my Leatherman tool that is quick and less bulky than the pouch I keep it in now. I narrowed the search down to the RAE metal sheath.
Here is a photo of the commercial version and my diy version


A while ago one of the tenants threw out a metal Ikea bed frame. I took it apart and put it in my scrap pile. I cut this piece from it.

I cut it to roughly the right length then sliced it down the middle with the hacksaw.

Then I bent it into roughly the correct shape. It was surprisingly hard to bend.

I used a bench grinder to round the corners and dull the edges. Then the wire wheel on the grinder to remove (most of) the powder coating. I have a little more work to do. I will watch for a good belt clip at the swap meet and rivet it onto the back.

Re: Make Stuff Log
Posted: Fri May 20, 2022 12:11 pm
by shaz
Why did you remove the powder coating?
Re: Make Stuff Log
Posted: Fri May 20, 2022 7:00 pm
by Ego
I like bare metal. When it is finished I will coat it with clearcoat.
Re: Make Stuff Log
Posted: Tue May 31, 2022 12:02 am
by mountainFrugal

Super simple.
I made a bunch of blank zines out of single sheets of Rite in the Rain water resistant printer paper and a stiff cardboard sketching board from some left over packaging material. The idea is to always have paper with me while running.
I also made some water resistant sketchbooks for hiking with a larger sketching board.
Re: Make Stuff Log
Posted: Mon Jun 06, 2022 11:50 am
by theanimal
Prompted by a incoming addition to the family, DW and I decided to upgrade our bed from a twin to something larger that would better be able to fit all 3 of us. The catch is that we did not want to give up any additional floor space due to space being already at a premium in our small abode (320 sq ft). So we decided to put it on the ceiling, lowering it at night, where it rests on our couch and coffee table. During the day, the idea is we raise it back up and tie it off until needed once more. The combination of the Egos' murphy bed and the suspended kitchen/ping pong table of some other friends served as inspiration. We were able to repurpose almost all of the material from our last bed and only needed one additional board for the new structure.
All is good with the frame. All is not well with our rigging system and I'm posting here in search of suggestions and advice. At the moment, we have 4 pulleys hanging off of hooks from the ceiling. Rope goes from the pulleys down to each of the four corners where the rope is threaded through a hole in the bed frame and is tied back to itself. Our problem is that pulling the bed up is far too difficult with the current configuration. We are stumped as to what to do to make it easier. Change the configuration? All ropes go to centralized area above bed, are braided and go through block and tackle? More pulleys?
Any thoughts?
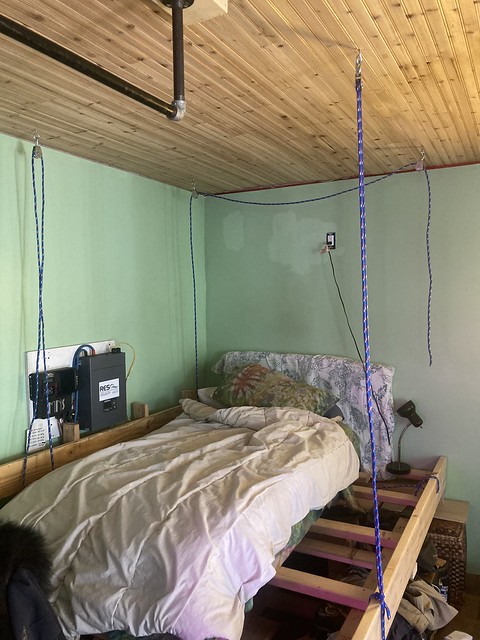
Please excuse the mess. This project has upended half of our house.

Re: Make Stuff Log
Posted: Mon Jun 06, 2022 12:09 pm
by Ego
Cool! Block and tackle will definitely make it easier to raise and lower.
Re: Make Stuff Log
Posted: Mon Jun 06, 2022 1:25 pm
by candide
@theanimal
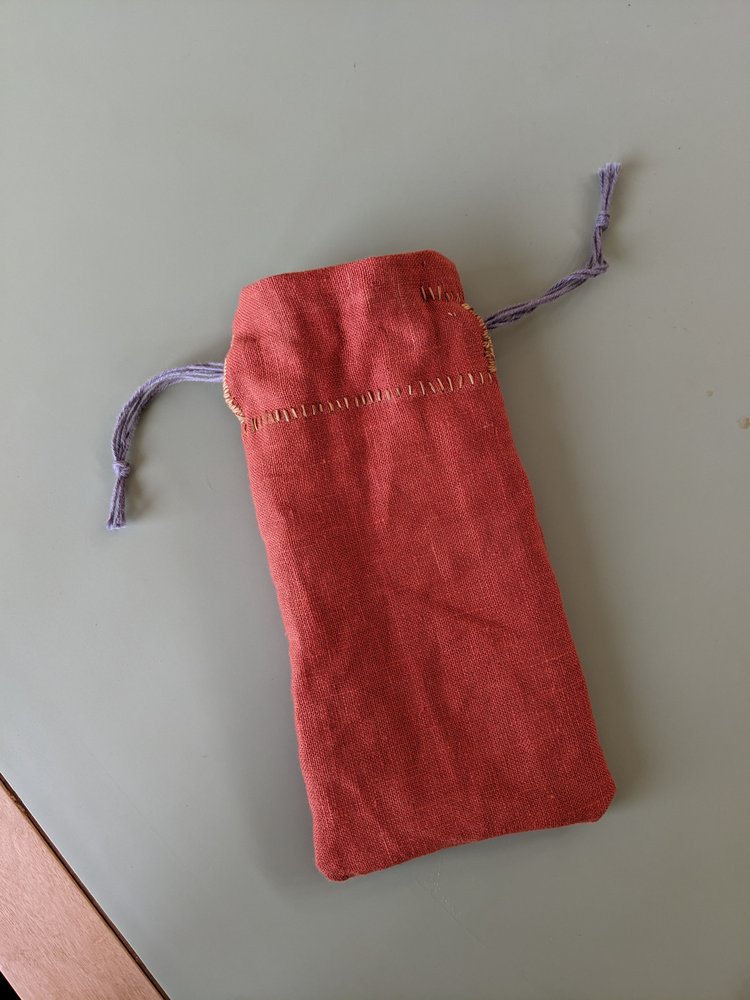
Cool stuff. I always find your example inspiring and humbling. My recent make is also in a round about way to make room for my little one who is on the way. It is a small, piddling thing in comparison.
Re: Make Stuff Log
Posted: Mon Jun 06, 2022 1:30 pm
by candide

I used to think nickles were the best hedge for inflation you could get because the metal in them was worth more that 5 cents.
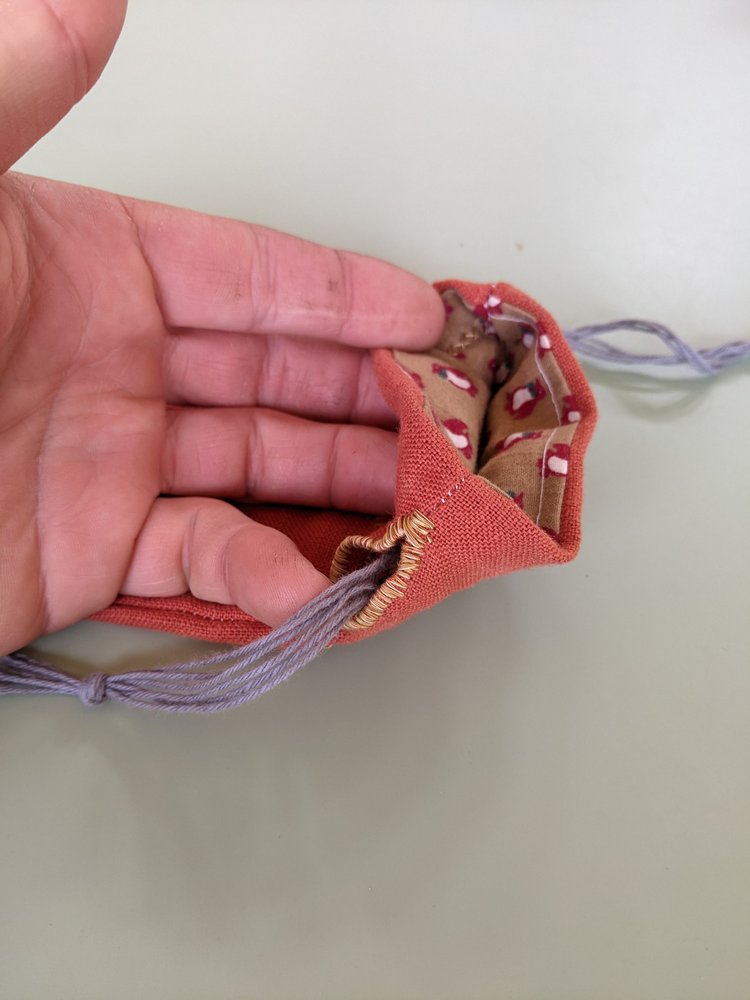
So, I had a lot of nickels stored in the nursery, and they needed to go (to the garage). I made this little thing to register when there are $2 worth of nickles so I can put them in a rolls.
Now that it has served that purpose, it sits on my dresser to hold the nickles I get as change until I have enough for a roll.
I also put in a few nails to give a pencil a place to be.
Edit: added were the nickles went.
Re: Make Stuff Log
Posted: Wed Jun 08, 2022 3:03 pm
by theanimal
The finished product.

The lower edge of the bed frame sits at about 6'2". 4 pulleys at each corner direct ropes from the bed frame to a block and tackle system to hoist everything up. It's still a little more difficult than ideal for me to raise and too difficult for Mrs. Animal so we'll have to figure something out to make it a little easier at some point later on. At night we bring it down to rest on the couch and a soon to be built coffee table. Previously, we used under the couch as storage by lifting up the cushions. We are going to keep it as storage but switch to using large drawers underneath, also yet to be built. Underneath the couch also houses our battery system, which you can kind of see in the photo, the red thing in the bottom left of the photo/couch.
ETA: Thanks for the advice Ego and thanks for your kind words Candide.
Re: Make Stuff Log
Posted: Wed Jun 08, 2022 3:23 pm
by Slevin
theanimal wrote: ↑Wed Jun 08, 2022 3:03 pm
It's still a little more difficult than ideal for me to raise and too difficult for Mrs. Animal so we'll have to figure something out to make it a little easier at some point later on.
This seems like a hand crank winch sort of problem IMO. I think you can build them with some old scavenged bike parts if you don't want to spend any money on it. The crank with a decent gear ratio should make it much "easier" to raise / lower, but it will definitely take more time due to the gear ratios.
Re: Make Stuff Log
Posted: Wed Jun 08, 2022 3:32 pm
by theanimal
That's an excellent idea, thank you Slevin!
Re: Make Stuff Log
Posted: Wed Jun 08, 2022 6:12 pm
by KRUMPn
@theanimal That bed/couch is dope! Great work! I saw a guy that ran a tea shop out of a converted short bus that had something similar and I thought it was the coolest thing I've ever seen.The only other option I can offer is the roll up floor mattress. That was my plan for studio living (and my set up in my truck). If you have enough separate mattresses i.e. 4 twin xl mattress (like
this) you could use the bottom two for a floor couch with the other two making a back rest.You would have to be cool with being on the floor though. Your's is way cooler too, but I thought I'd throw it out there for anyone looking to save space in a small area.
Re: Make Stuff Log
Posted: Wed Jun 08, 2022 10:06 pm
by Scott 2
Can I ask what gives confidence in sitting under the hanging bed? No criticism intended, but a genuine concern for your safety.
Going near a suspended load always makes me nervous. I don't think I could relax beneath one, without multiple fail safes in place. Knowing the sleep deprivation new parents go through, operator error seems especially risky.
Re: Make Stuff Log
Posted: Wed Jun 08, 2022 10:35 pm
by Slevin
I think it’s 4x redundant? I.e. if you lose 1 pulley you should still be suspended due to the other 3? But yeah I might double up those ropes + pulleys because that does look heavy.