Today I ate coconut milk yogurt which is plant-based so vegans/gluten-intolerants/non-dairy people could look into it but I doubt any of them have continued reading up to this point so here is Kurma Dāsa's regular yogurt recipe that was linked in an earlier thread but the page has moved since then:
RM from West Pennant Hills NSW wrote:In the past I have successfully made my own yoghurt, but over the years I have forgotten how much milk to use. I always used a small tub of plain yogurt starter, plus the milk and a tin of carnation evaporated milk. Can you help with those milk quantities please?
Yogurt is an indispensable ingredient in vegetarian cuisine, being nutritious, tasty, and easily digestible.
It is a source of calcium, protein, fat, carbohydrates, phosphorus, vitamin A, the B-complex vitamins, and vitamin D. The lactic acid content of yogurt aids in the digestion of calcium. Yogurt encourages the growth of "friendly" bacteria in the intestines that help destroy harmful strains. And yogurt is quickly assimilated into the body.
Yogurt is made by adding a small amount of 'starter' (which can be either previously prepared homemade yogurt or commercial plain yogurt) to warm milk. Under certain temperature conditions, and after some hours, the live bacteria in the starter will transform the milk into yogurt, which can then be refrigerated and used as needed. If you prefer a slightly thicker, firm yogurt, you can add milk powder at the beginning.
PREPARATION TIME: 20 minutes,
SETTING TIME: 4 - 10 hours,
YIELD: 4 cups (1 litre).
1/3 cup fresh milk (optional),
1/2 cup full-cream milk powder (optional),
4 cups (1 litre) fresh milk,
3 tablespoons fresh plain yogurt.
If you prefer thicker yogurt, combine the 1/3 cup of milk with the milk powder, whisk until smooth, and set aside.
Bring the milk to the boil in a heavy, 3-litre/quart saucepan, stirring constantly. Remove milk from the heat and whisk in the optional powdered-milk thickener. Transfer the milk into a sterilized container and set aside to cool.
When the temperature of the milk has reached 46°C/115°F, add the yogurt starter and whisk until smooth. The milk temperature should not exceed 44°C/111°F, which is the ideal culturing temperature. If you don't have a thermometer, that ideal temperature is about body heat; splash a little on the back of your hand to check.
Place the container of warm milk in a warm place for 4 - 6 hours. You can place the container inside a sealed plastic bucket of warm water or wrap it in a towel or heavy blanket. The container may also be placed in an oven with the pilot light on, in a preheated electric oven which has been turned off, or in a wide-mouthed thermos flask.
Check the yogurt after 5 hours. It should be thick and firm (it will become thicker after refrigeration). Refrigerate, covered, and use within 3 days. After three days, the yogurt makes an ideal curdling agent for production of Home-made Curd Cheese (Panir).
Note: If your home-made yogurt does not taste as nice as expected or is something other than yogurt, consider the following points:
Over-boiling the milk without proper stirring can cause the milk to scorch or burn. This will give the yogurt an unpleasant taste.
If the milk does not sufficiently cool before you add the starter culture, it will curdle.
If the milk cools too much before adding the starter culture, it will remain milk.
If you do not ensure continuous warmth during incubation, the yogurt might fall to a less-than-desired temperature. Over warming during incubation causes spoilage.
Over-incubation (allowing the milk and yogurt to sit for longer than required) will produce a strong-tasting, tart yogurt.
Non-sterile containers may introduce foreign bacteria into your yogurt, causing bad tastes. Do not disturb the yogurt while it is culturing.
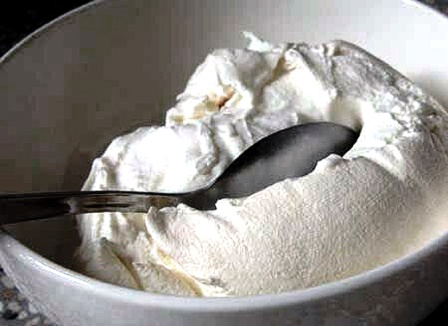
To thicken your yogurt, spoon it into a cloth, place in a collander over a bowl, and allow it to drain for a few hours. It will lose excess moisture and turn into a delicious yogurt cream-cheese, as in the picture above.
 nice, very nice! congrats...