jacob wrote: ↑Wed Jul 05, 2023 11:24 am
I've already cannibalized the Leonardo, because I'm going back to "
The Mun" (Kerbal Space Program). This time I want to go in style, so I'm building an old school NASA launch board.
Halfway there now having understood the ingredients after unit-testing. Only a few potential SNAFUs left. Now "all" that remains is putting together the recipe. (See
https://www.youtube.com/watch?v=REFwqTQ7k24 for the ingredient/recipe metaphor)
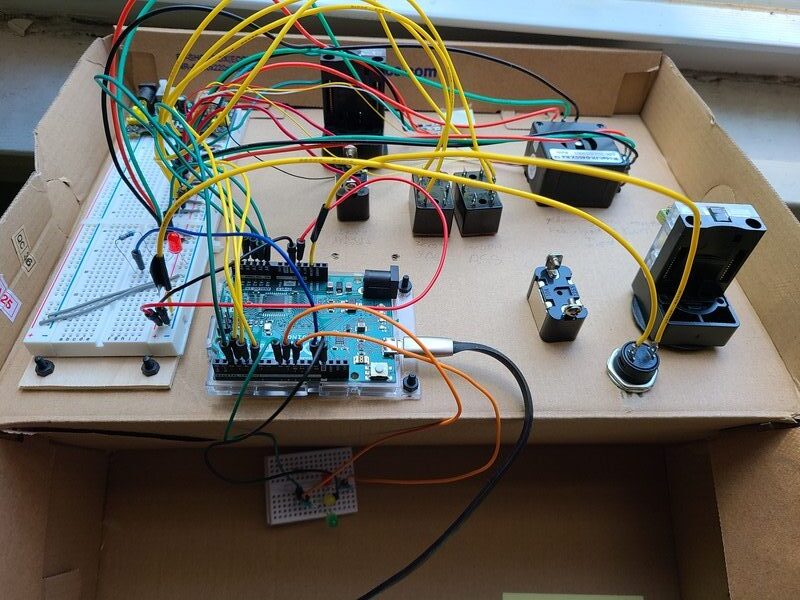
Unlike the 1-way controller project above (controller->game only), KSP offers 2-way interactions (game->controller, think displays), which means more to learn. And more wires! I really need a wiring method of some sorts to get this under control.
For those who don't know,
KSP simulates a space program on a fictional planet ranging from early NASA to SpaceX and beyond using materially realistic physics. Nevermind the fiction! What's important is the level of both professional and amateur support for the realism. It's a sandbox for planning and executing orbital mechanics for those who think that part of the human experience constitutes fun. I do, having calculated transfer orbits with pencil and paper back in the mid 1990s.
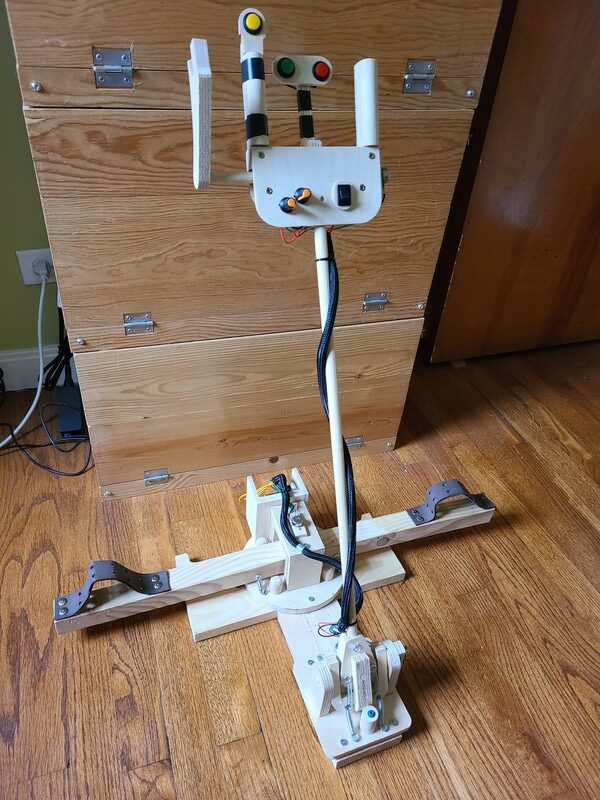
Some pictures...
The design part is tricky. Looking at the internet, there are many cool designs. Here's mine, which is not that cool. It's a shoebox. Things to learn to spice it up would be how to cut aluminum and make screen prints. I could build it out of wood, but I don't think the buttons would fit the aesthetics.
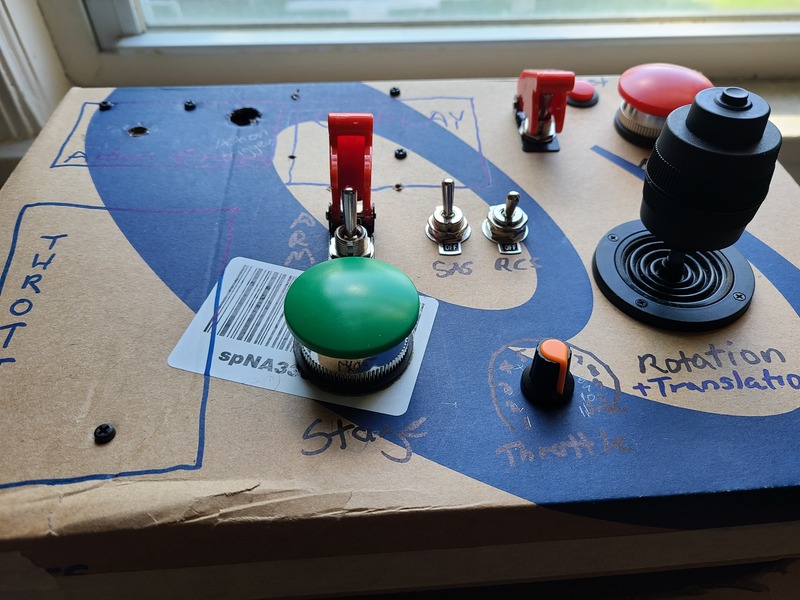
Using a shoebox has the advantage of being quick to build. However, looking at the underside, it's not like one can move things around that easily. Most likely moving a button around would require rebuilding in another shoebox.
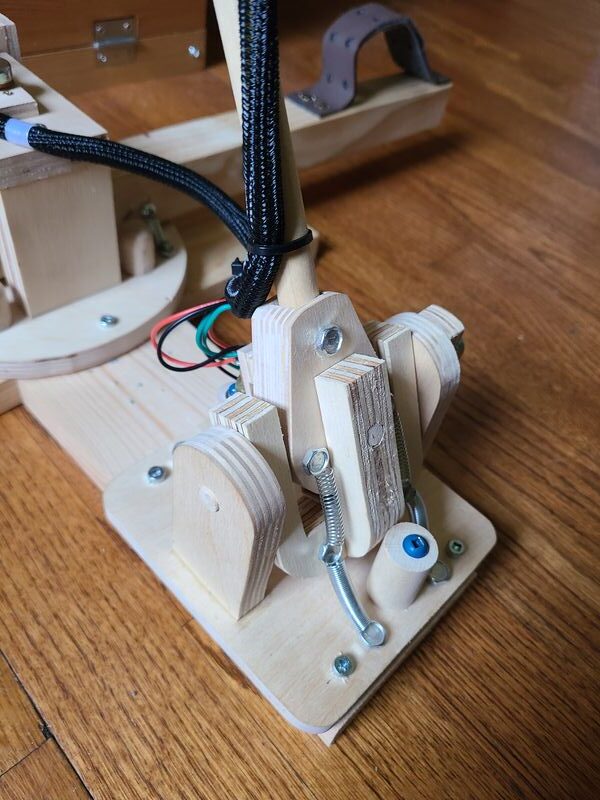
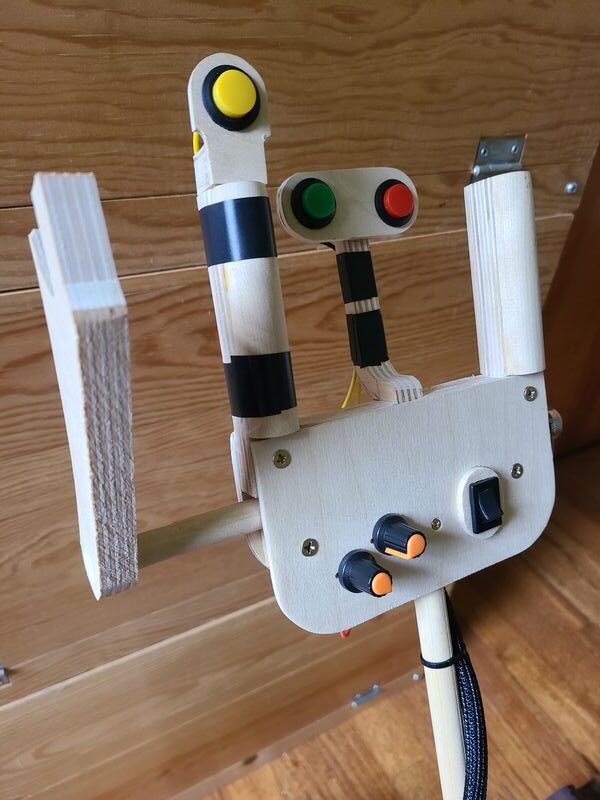
These controls are enough to launch and control a rocket into orbit. The fanciest part here is the 3-stage arming of the launch button and the 3-axis controller that does rotation AND translation when the button is pressed for a total of 6 axes in space. (The early part of calibrating the "reaction control system" to the stick led to a few launches that looked very much like the rockets in the 1950s spinning out of control into the distance

Fortunately, my astronauts are not only very brave but also stupid.)
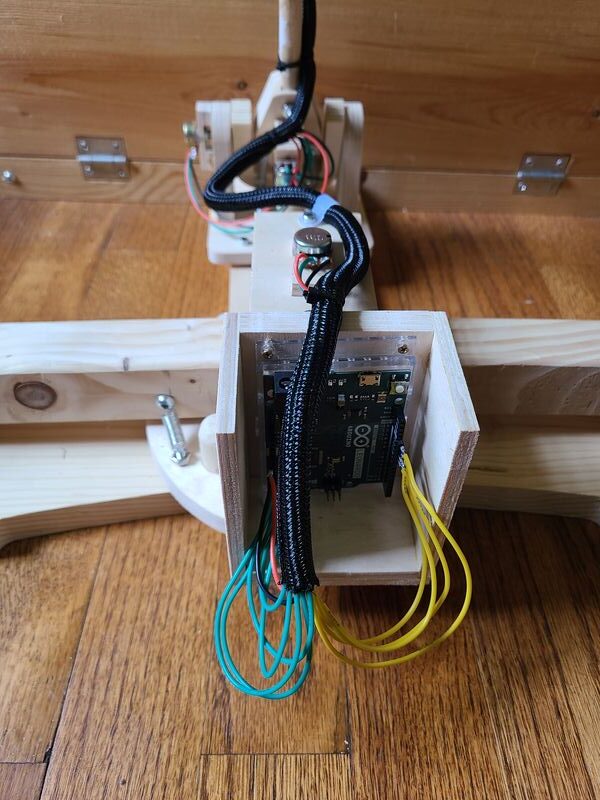
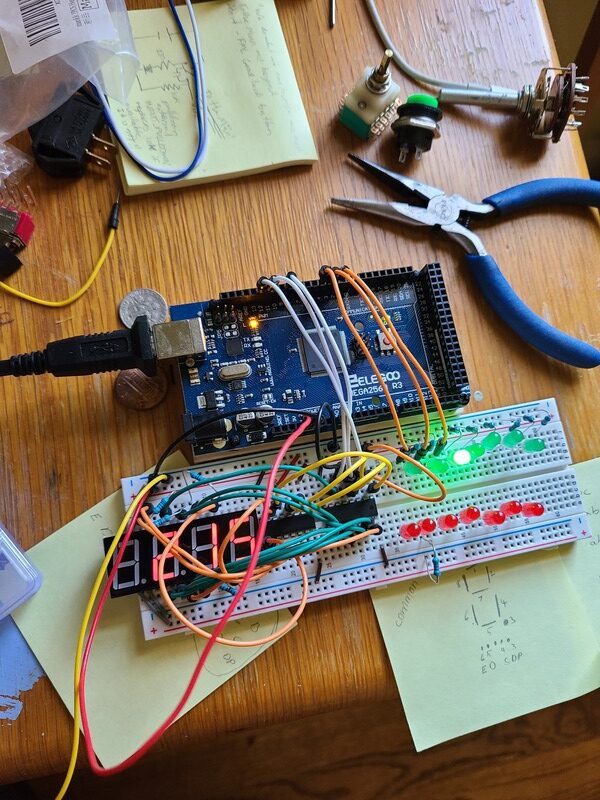
The coolest thing is the ability for the game to control output. @Anesau sent me their arduino mega starter kit, which included a 7-segment display and some 74HC595 shift registers. This was absolutely the most difficult thing to program and get right. (I did not use a library. Each of the 32 LED-segments is controlled by two chained shift registers with the Arduino flipping individual bits. The way that works is that you flip the voltage on the "latch" pin. The you use a second "clock" pin flipping it back and forth between 0 and 1 to sync up with the actual "data" pin that sends 0 or 1 depending on whether you want the shift register outputs to be high or low. Once all the data is sent, the latch pin is flipped again and if everything went right, the correct output pins go high or low as they need to. One register (8 outputs can control one digit), the other one(*) controls which of the 4 to light up. Then I just cycle really fast making it look like they're all lit. Here it displays the vertical velocity of the rocket (215m/s). (The green LED is part of earlier testing and shows that the rocket is going faster than 150m/s) I somehow find the ability to build something like this to be enormously cool. What will those nerds think of next?
(*) Being a common cathode display, this register actually acts as a current sink. I worried about that one but no magical smoke appeared when I switched it on. I could not figure out a way to do it otherwise with the components I had at hand.
Of course after doing all that I found a
$2 plug-in display that contains everything I need. This replaces the original plan of controlling two 4-digits with 3 shift registers

Something similar is possible in reverse. Instead of individual wires from each button, I can send 8 of them into a 74HC165 and have only 3 wires go back to the Arduino. This is not done yet, but should be similar. One thing that seems useful here is a set of 10 buttons for the SAS autopilot (prograde, retrograde, normal, antinormal, radial, antiradial, target, antitarget, maneuver, ...)
Ultimately, it would be cool to design a controller so that the only thing that needs to be handled from the computer are the maneuver calculations and everything else is displayed and executed on the controller, e.g. "time to burn", "delta-v", etc.
PS: Once again I found myself struggling with the wiring.